
Monday, March 27, 2017

Friday, March 17, 2017
Pond Dredging on Hole #5
The upper end of the pond on #5 has been slowly filling with sediment from silt contamination that has washed down the stream and into our pond. This is a slow process but it has really come to the surface in the last number of years. The pictures below illustrate the problem and what we did to remove the silt.

Pictures from 2014

Even a small stream like this can carry tons of silt.
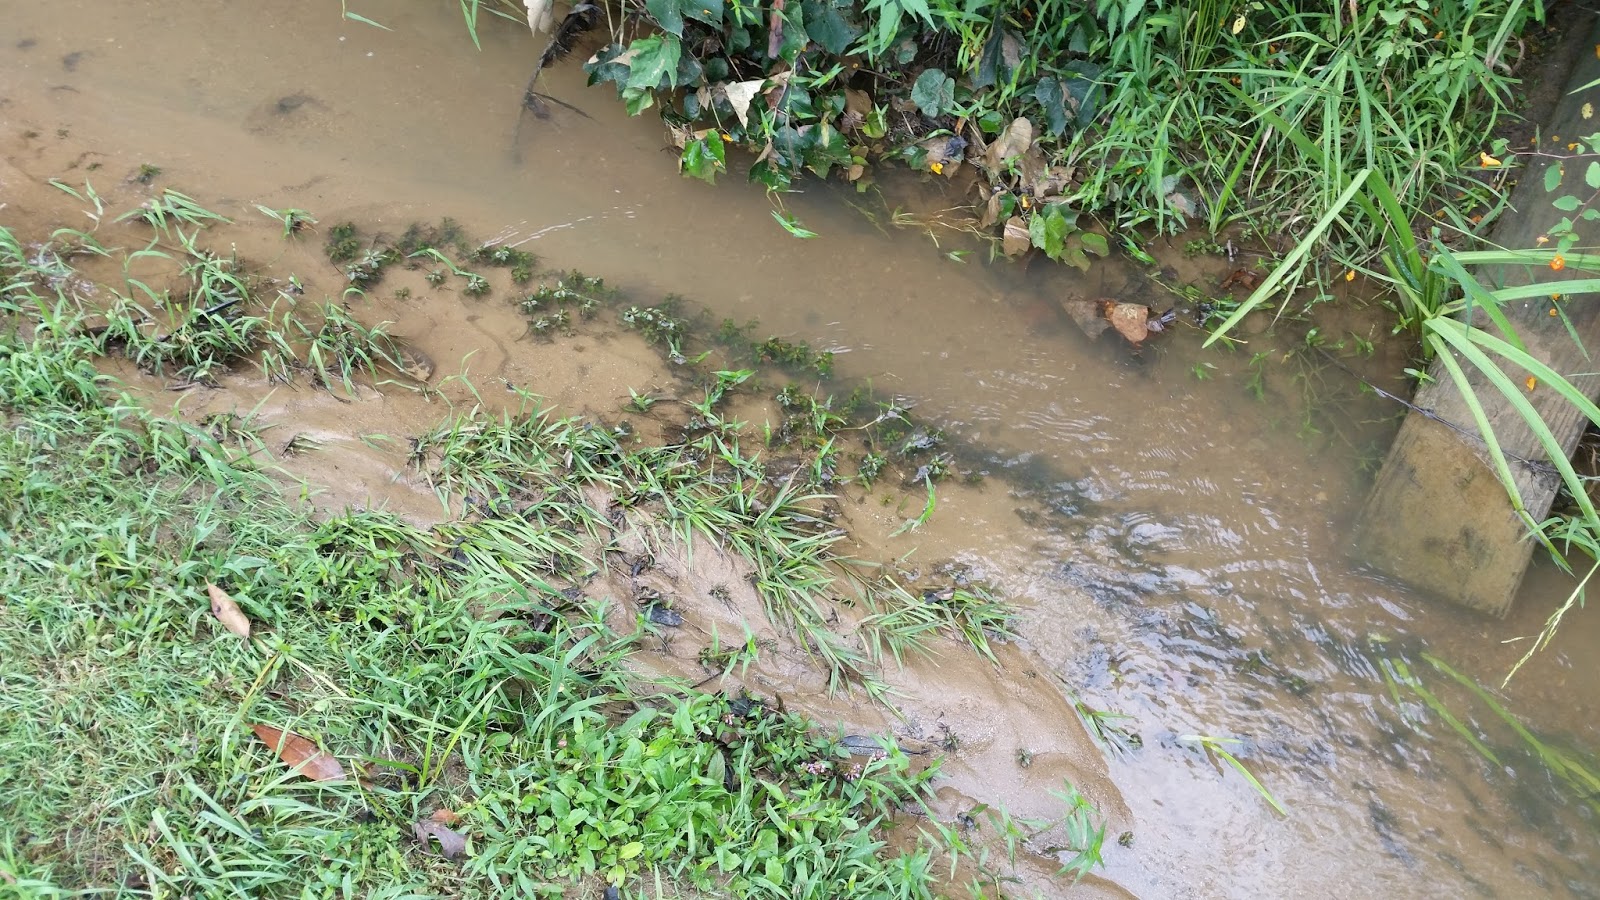
A closer view of the silt washing in after a rainstorm.

Cumulative effects in our miniature "Delta" region.

Look at the silt flowing out.

Over the next couple years this area becomes very shallow.
Pictures from 2017

The pond has been drained to start the project.

This end had become completely contaminated and was no longer part of the pond.

A view of the rest of the pond.

The muddy work has begun.

The excavator is sitting on a platform to keep from sinking.
He moved these platform sections all around the pond to do the work.

Concrete was placed in many sections of the spillway to reinforce.

Getting close to finishing.

Deep in the mud,.

Pits were dug to hold the silt and let it dry. Once these pits dry out they will be covered up.

A look a the new upper section of the pond.

Loading up the platforms at the end of the job.
Thursday, March 16, 2017
Bunker renovations on #6
The bunker in front of the green on hole #6 has been redesigned. We took away the steep slope of sand and shaved off the top of the mound so the green can be visible from inside the bunker and the approach. I think everyone will enjoy the changes we have made to this bunker.


Digging into the slope revealed mostly sand.

We brought in 10 workman loads of topsoil to rebuild the slope.

The new slope is much less severe with gentle contours.

The top of the slope is much flatter providing a clearer view of the front of the green.

Rough sod is being replaced and stapled in place.

The new edge is cut into the bunker.

A view from the opposite side.

We reused all the original sand.

The end result.
Monday, February 27, 2017
Just another sinkhole repair.
A very small sinkhole is always a tell tale sign of a failing culvert. We have fixed many of these in the past all over the golf course. We use double walled pvc pipe that will last much longer, long enough we will never have to worry about replacing them again.


First step is to dig in the location of the sinkhole and find the pipe.

A bad section has been removed and we will connect to this steel culvert here.

Most of the bottom half of this culvert has deteriorated and is gone.

We always replace with double wall pvc drain. In this instance the pipe is 18 inch.

Connected the plastic to the steel with a poly seal coupler.

We are replacing the old steel culvert all the way to the catch basin.

We were able to slip the new pipe underneath the existing irrigation line.

Old culvert is taken to scrap yard and recycled.

Plywood sheets help us keep the fairway safe from damage during the project.

A view of the finished work.

We fixed another small sinkhole on the outlet side as well.
Wednesday, February 22, 2017
#15 White/Gold Tee Renovation
This very long and narrow tee lost much of its tee space due to sloping off on both sides. This was a common occurrence on many of the tee boxes we have changed in this project. This tee remains much the same but will be wider, flatter, and easier to maintain.


Tuesday, February 14, 2017
#13 White/Gold Tee Renovation
This tee on #13 was crowned off on both sides making it narrow. The surface also needed leveling badly!


Subscribe to:
Posts (Atom)